Getting Started
Calling the API
There are several ways you can make calls to the Receptiviti API. How you choose to do so is dependent upon your experience and comfort level in the different tools available. Some of the most commonly used methods are found below.
You can access our developer documentation through our API Reference page, found here.
The Receptiviti CSV Upload Tool
This is a basic user interface we provide where you can upload a CSV file of text to have it scored and returned as a separate CSV. This is an easy way for people with no programming experience to use the API. Note that you will need an account to use the CSV upload tool. You can initiate an account by going here.
Further details about using the CSV upload tool can be found here.
Python
To use Python to make a single text sample call to the Receptiviti API, you can use the following syntax in your Terminal, replacing api_key and api_secret with your actual credentials, as well as adding your text sample to the "content" section:
import json
import requests

url = 'https://api.receptiviti.com/v2/analyze/written'
api_key = <YOUR_API_KEY>
api_secret = <YOUR_API_SECRET>
data = json.dumps({
  'request_id': 'req-1',
  'content': 'my text sample....'
})
resp = requests.post(url, auth=(api_key, api_secret), data=data)
print(json.dumps(resp.json(), indent=4, sort_keys=True))
The example above uses the default written norming context. The other default norming context is spoken. Alternatively, you can create your own norming contexts, which are available in your account once you create them. More information on norming and norming contexts is here.
Postman
Postman is a popular API collaboration platform widely used by developers. It allows you to make calls to endpoints you specify by authorizing your credentials and using your own input data. You can use Postman with or without an account — the Scratch Pad feature allows you to make API calls without an account, but if you want to create a Workspace and save your API calls, you will need an account. Either way, you will need to download the Postman desktop app.
To get started using Postman (with an account):
-
In Postman, create a new Workspace, then open a new tab.
-
In the Postman input fields, configure the following:
-
From the drop-down menu, select POST.
-
In the URL field, enter
https://api.receptiviti.com/v2/analyze/written.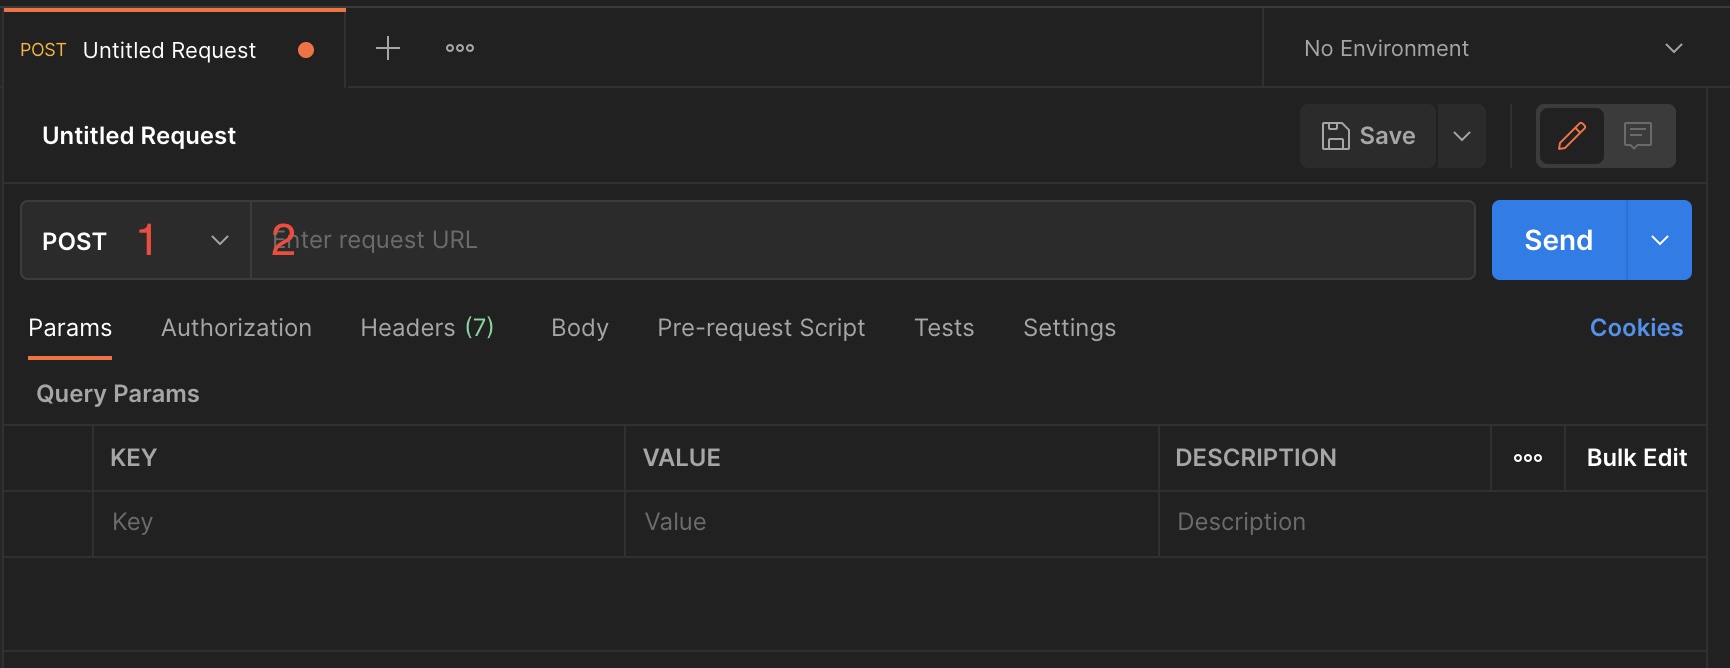
-
Click the Authorization header, and in the Type drop-down, select Basic Auth.
-
To the right of the drop-down, in the Username field, paste your API Key, and in the Password field, paste your API Secret. Both are found in your dashboard.

-
Click the Body header, then click the raw button, and then select JSON from the drop-down menu.
-
In the content window below the settings you just configured, paste your text sample and be sure to have it formatted in JSON. (Note that these instructions specify a call with a single text sample.)

-
Finally, click Send.
-
You should see a successful response (Status: 200 OK) that lists the scores of the measures associated with your Receptiviti account in the Body tab of the Response window, which appears just below where you pasted your sample. If you are getting an error, be sure that you selected POST as the call method, that the body is properly formatted JSON, and that the endpoint is exactly as it appears above in step 2.2.
For more in-depth information about the Receptiviti API endpoints, as well as code samples for calling the API programmitcally, see the API Reference section. For more information about interpreting the responses, see the Frameworks section.
The example above uses the default written norming context. The other default norming context is spoken. Alternatively, you can create your own norming contexts, which are available in your account once you create them. More information on norming and norming contexts is here.
cURL
To use cURL to make a single text sample call to the Receptiviti API, you can use the following syntax in your Terminal, replacing <YOUR_API_KEY>:<YOUR_API_SECRET> with your actual credentials, as well as adding your text sample to the "content" section:
curl --location --request \
POST 'https://api.receptiviti.com/v2/analyze/written' \
-u <YOUR_API_KEY>:<YOUR_API_SECRET> \
--header 'Content-Type: application/json' \
--data-raw '{
    "request_id": "req-1",
    "content": "my text sample...."
}'
For more in-depth information about making calls to the Receptiviti API and interpreting responses, see the API Reference section.
The example above uses the default written norming context. The other default norming context is spoken. Alternatively, you can create your own norming contexts, which are available in your account once you create them. More information on norming and norming contexts is here.